 |
 |
 |
|
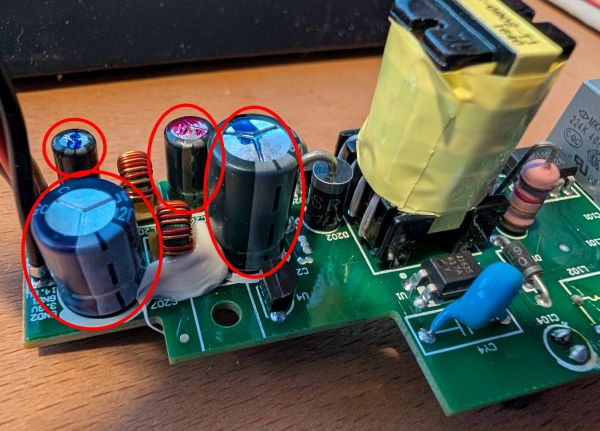
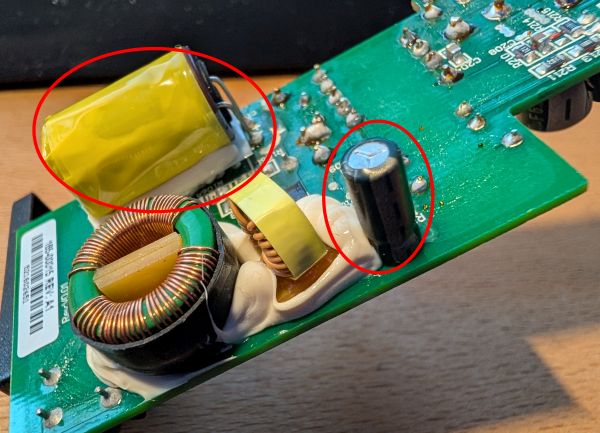
FoggyLogSat Jan 17th 2026 21:17:58: Sonos Connect PCB RepairsBoth my Sonos Connect Gen2 devices failed in the past few months, so I decided I should probably try and repair them. I found this really useful DIYAudio.com thread which gave me a good idea of what might be wrong. One of my units was working according to the app, but no sound was coming out (low / no analogue output?). The other one worked, but was regularly cutting out (PSU ripple causing the amplifier to mute?). When I investigated, the one that was cutting out had two swollen capacitors in the PSU. The other one had no visible issues. I went ahead and replaced the six electrolytic capacitors in the power supply (photos prior to replacement):
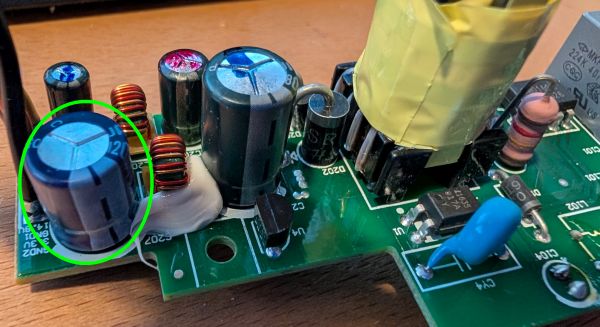
I tested the PSU outputs before reinstalling it and found the ~14V rail was around 18V and the 3.3V was oscillating all over the place on my multimeter. So I reinstalled the original capacitors one at a time and found that the problem went away when I put the original 3.3V output capacitor back in place - this one circled in green:
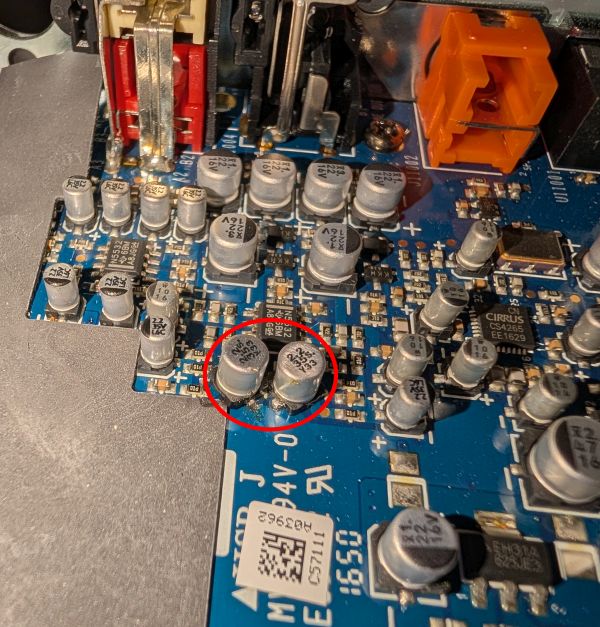
I also replaced the following SMT capacitor on the amplifier board (Linear regulator output capacitor and two capacitors in the audio path), as the DIYAudio.com thread I mentioned above pointed towards these for muting issues and no audio output (photos after replacement):
When I put them both back together, this seems to have solved all the issues and they are happy again :-) My capacitor shopping list (excluding the one I didn't use on the PSU board) was:
If you'd like a kit of capacitors, you can buy my left over ones here Be aware the capacitor replacement is a bit tricky as there are some big copper areas on the PSU board which means you'll need a good soldering iron and the SMT capacitors are pretty tight for space

|
|